How to Change Language on iPhone
Changing language on your iPhone or iPad can be useful for a variety of reasons. It might be for learning a new language, or just to have an easier time understanding an app’s menus or settings.
Apple’s iOS devices support more languages than you might think, and changing them is quick and easy. It’s also reversible if you decide to go back to the language that was originally set.
Language & Region
If you’re traveling or moving to a new location, changing your iPhone’s language can be a handy way to communicate with people who speak a different tongue. It can also be useful for navigating different dialects of your own native tongue.
iOS lets you change the language and region of your device at any time. These settings control everything from the units of measurement Siri uses by default to accessing some apps, like News. They’re normally set up to reflect the place you bought your device, or what you chose during setup, but you can change them at any time.
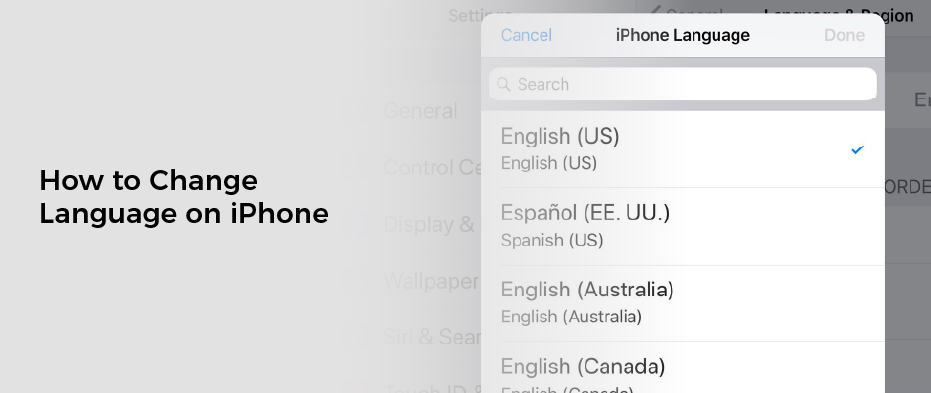
To change the language, go to Settings > General. From there, you can tap Language & Region — the fourth entry on the screen.
When you change your region, iOS will download a new language package and install it on your device. This can take some time depending on your internet connection, so be sure to use a strong wi-fi connection when changing the language on your iPhone.
Once your language has been changed, the app will be automatically displayed in that language from now on. You can also use the keyboard to switch between languages.
In some cases, you may want to use a language other than your iPhone’s primary language, such as British English instead of American English. This will allow you to dictate messages or use the dictionary in a different language.
You can also add a second language to your preferred list of languages so that it will be available for apps that don’t support your current default language. You can also change the order in which the languages appear on your list.
For example, if you want to use French instead of American English in an app, you can move it up to the top of your preferred list. If you want to switch back to the default language, move it down to the bottom of your list.
You can also set a different language as your default language for specific apps, which can be useful for interacting with people who speak a language you don’t understand. However, this feature will not work for everything on your phone, so you’ll need to manually select an app and change its language.
Apps
One of the most overlooked iOS features is the ability to change app language independently from your system or default language. It can be helpful if you use a lot of different apps or want to try a new language when traveling.
There are a few ways to do this. First, you can use the settings app to change your primary system language. This will apply the entire device, including apps, autocorrect, and word prediction.
Next, you can add a second language to your iPhone. This will be used if an app doesn’t support your preferred language. If you don’t like the second language, you can delete it and revert to your original language.
Another option is to manually change the app’s language. This works in most cases, but some apps may not support this feature.
If you want to change the language of an app, follow these steps:
Launch the Settings app on your iPhone and tap General – Settings from top. Then, scroll down to see installed apps and select the app whose language you’d like to change.
From the app’s settings, you should see a heading called “Preferred Language.” Under that, choose “Language”; select the language you’d like to use.
To make the change permanent, tap Done. Then, your iPhone will update its settings to match the new language.
Depending on the app, you might need to restart your phone after this change. This process should take a few seconds.
If you’d prefer to change back to your default language, you can also do that by following the same instructions. Once you’re done, your phone will return to its home screen and display the new language.
This is a great way to learn a new language or practice a language you already know. It’s also a fun way to personalize your iPhone. And since it’s systemwide, you won’t lose any data. It’s a good idea to keep a backup language in case you need to change it later.
Keyboards
If you want to learn a new language or use your iPhone as a translator, changing the keyboard language on your phone can make a big difference. Not only do you get to use the iPhone’s built-in keyboard in that language, but also your phone’s word prediction and autocorrect features will be updated to match the new language.
The first step to change the language on your iPhone is to tap and hold on a text field or text input box, and then choose Keyboard Settings from the menu that appears. This will bring up a list of available languages, with the default one shown on top.
To enable a different keyboard, scroll through the list and select the one you want to use. If you’re not happy with any of the available keyboards, tap Edit at the top of the screen to reorder them and remove the ones you don’t like.
Once you have all the keyboards you’d like to use, you can choose to switch between them in Messages or any other app that uses the iPhone’s built-in keyboard. You can also quickly cycle through the options using a globe icon, which replaces the smiling emoji button on iPhone’s keyboard when you enable a new keyboard language.
You can also add custom words or inputs for the iPhone keyboard you’re using, and these will automatically be added to your personal dictionary as you type. These are useful for those who don’t speak the language they’re using, and for those who prefer to use their personal dictionaries instead of typing directly into the keyboard.
Lastly, you can choose whether to have the iPhone’s keyboard layout shifted to the left or right for larger screens, so that you can type with your thumbs. This is handy if you have trouble reaching the keys on the left side of your iPhone’s keyboard.
There are dozens of foreign language keyboards that are compatible with your iPhone, including some free third-party alternatives. These include Chinese and Japanese, which support a number of special characters that aren’t supported by the native language keyboards.
Siri
Siri, the virtual assistant that can be found on Apple’s products, has several features that allow you to change language and voice. Using this feature on an iPhone can be very useful, especially if you aren’t comfortable with speaking English.
To change the language used by Siri, first open Settings on your iPhone or iPad. Then, scroll down a bit and find Siri & Search. Then tap on Language to view a list of languages available for your device.
The list of languages will vary based on which device you have, but thHow to Change Language on iPhoneere are plenty to choose from. Some of the most popular options include Italian, Spanish, Swedish, Japanese and more.
Once you have chosen a language, you’ll be asked to confirm the change. Once you’ve made your choice, your device will be ready to use in the new language.
You can also change the Siri voice and accent if you want to. This is a feature that was only introduced in iOS 15 and has been updated to allow more variety in accents and voices.
In order to use this feature, you’ll need a WiFi connection and a compatible device (iPhone, iPad, Mac, or Apple Watch). Once the voice is downloaded, you’ll be able to hear it when it comes on.
However, you should keep in mind that changing the language on your iPhone will disable the popular feature “Hey Siri.” You’ll have to set up Siri once again in the new language.
There are many different ways to do this, but some of them will require that you retrain the app with new commands. This can be done in a few simple steps, and you can read on to learn how.
The other option is to change the Siri accent, which can be a bit tricky. There are many dialects that can be used to create the Siri voice, and it can be difficult to determine which one is best for you. In order to change the Siri accent, you’ll need a Wi-Fi connection and a compatible device (iPhone, Mac, or Apple Watch). Once you’ve selected the voice, you’ll be able to hear a demo audio clip of it.


